Early Childhood Homeschooling Made Easy

Taking teaching and your child's future into your own hands.

Science Experiment – Tabletop Hovercraft

IMG_9945

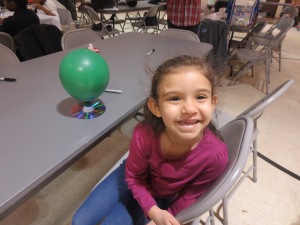
My daughter and I attended a homeschool gathering this past week, and they made these cool little hovercrafts out of balloons and cds.  My daughter loved watching this move across the tabletop as the air leaked out.  This is a great experiment for young kids, as well as older kids.  It’s super easy to put together, and only takes a few minutes to make.

What you need:

  • An old CD or DVD
  • A 9” balloon
  • A pop-top cap from a liquid dish soap bottle
  • A hot glue gun

IMG_9954 (2)

Experiment:

  1. Use the hot glue gun to glue the cap to the center of the CD or DVD disc. Create a good seal to keep air from escaping.
  2. Make sure the valve on the pop-top bottle cap is open.  Attach the balloon to the pop-top bottle cap.
  3. Turn the CD/DVD over to the flat side and put the center of the CD/DVD to your mouth and blow up the balloon all the way.  Close the valve of the pop-top bottle cap so the air will not escape.
  4. When your ready to test it out, simply put the craft on a smooth surface and open the valve on the bottle cap.  Air will start to leak out, causing the hovercraft to move.

IMG_9948 (2)

Observations:

Have the kids discuss what happened once they set the hovercraft on the tabletop with the air leaking out.  Did the size of the balloon make a difference?  Have the kids play around with blowing up their balloons at various sizes to see how this may alter the outcome.

The air flow created by the balloon causes a cushion of moving air between the CD/DVD disc and the surface. This lifts the CD/DVD and reduces the friction which allows the disc to hover freely.  Kids tend to think this is pretty cool to see.

You can show them examples of large scale hovercrafts on the internet or in a book.  Large scale hovercrafts are capable of traveling over land, snow and water.  Let them compare their small scale hovercraft to a large scale hovercraft.
Leave a comment »

Science Experiment – Elephant Toothpaste (Creating Foam)

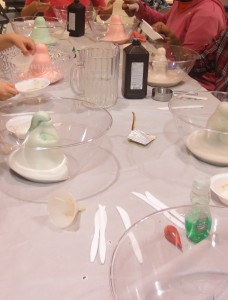
IMG_9950 (2)

My daughter just did this science experiment at a homeschool gathering, and I thought it was pretty neat and easy for young kids.

What you need:

  • Empty plastic water or pop/soda bottle
  • 1/2 cup hydrogen peroxide (20 volume or 6% solution)
  • Squirt of Dawn (or other brand) dish soap
  • 3-4 drops of food coloring
  • 1 teaspoon yeast
  • 2 tablespoons very warm water in a small bowl or cup
  • Funnel
  • Big bowl or foil pan
  • Safety glasses (if you feel it is necessary)
  • Play clothes, apron, or art smock (to protect your clothes from the food coloring)

IMG_9961 (2)

Experiment:

  1. Have kids put on their play clothes, apron, or art smock.  Put on safety glasses, if you feel it’s necessary.  We didn’t use them.  Each child should have in front of them a big bowl or cake pan, plastic bottle, dish soap in small cup, food coloring, 1/2 cup peroxide, 1 teaspoon of yeast, and 2 tablespoons of warm water.
  2. Mix yeast and warm water together in a small bowl or cup.
  3. Stand the bottle up in the center of the bowl or cake pan. Put the funnel in the opening of the water bottle. Add 3-4 drops of food coloring to the peroxide and pour the peroxide through the funnel into the bottle.
  4. Add the dish soap to the peroxide in the bottle.
  5. Pour the yeast mixture into the bottle and quickly remove the funnel.
  6. The kids can touch the bottle to feel any changes that take place.
IMG_9966

Kayla smelling the foam.

Observations:

After the experiment, have kids discuss what happened when they poured everything into the bottle.  How did the foam look?  When they touched the outside of the bottle, how did it feel?  Was it warm or cool?

The reaction creates foam that shoots up out of the bottle and pools in the bowl/pan. After a minute, it begins to come out in a moving stream that looks similar to toothpaste being squeezed out of a tube. The kids can play with the foam as it is just soap and water with oxygen bubbles. The bottle will feel warm to the touch as this is an exothermic reaction.

*Please note that in my family, we have a bit of an allergic reaction to hydrogen peroxide, so it is important for us to wash our hands immediately after doing this project.  If you think or know your child is sensitive to hydrogen peroxide, just be sure to have them wash their hands thoroughly after doing this experiment.

Leave a comment »